
Making a New Jigsaw Linocut Print
I recently finished a large lino print using my Conrad monotype press. It was the first big linocut I made on it. The linoleum cut print was made using the jigsaw method - a great way to make multi-color prints. Essentially, with this technique you cut your linoleum block into pieces, which are then inked separately, and put back together (like a jigsaw) before printing.
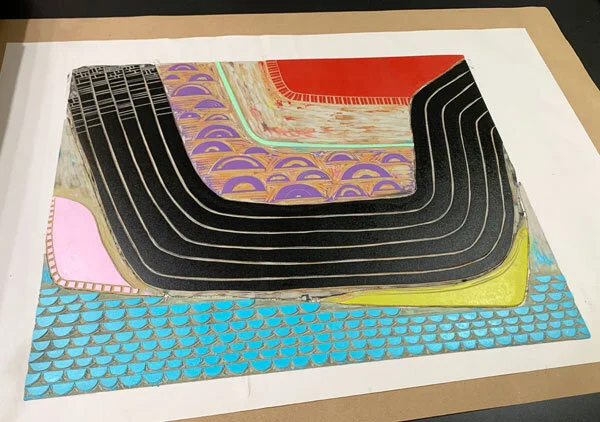
First layer of an assembled jigsaw linocut.
Here are some tips that I’ve learned when making jigsaw lino prints with unmounted linoleum:
Starting with a whole piece of linoleum, I usually first deeply carve the outline of the jigsaw pieces with a v-gouge.
If I’m not trying to be too exact, I might use some good sissors to cut out the shapes. If I want more precise cuts, I use a wood carving or X-Acto knife.
Trim any stray bits of burlap that overhang the edges.
Ink the lino pieces separately before assembling them into a whole.
Draw an outline of the assembled jigsaw on a piece of newsprint. In other words, if it’s a 11”x14” print, I’d draw an 11”x14” rectangle on newsprint. This gets placed underneath the inked jigsaw pieces so when you go to place the inked blocks down to print, you know they all need to fit within this outline.
On the pink section of my new 30”x 24” linocut print in the photo, I did a reduction and printed a second pattern on top. This is the final linoleum cut print.
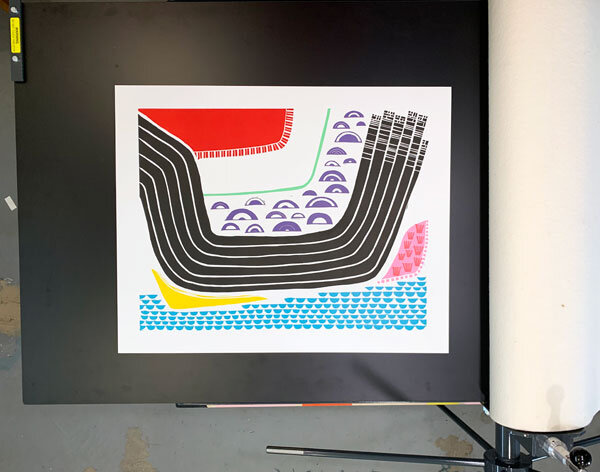
Finished jigsaw linocut print