
How to Make a Block Print Stamp
Stamp printing is a great, easy method of making a relief print. Though I make my editioned prints with traditional linoleum, rubber carving blocks are a fun DIY way to stamp on paper and fabric. They’re also a great introduction to printmaking for kids - that’s how I really got into them with my own children.
I'm going to give you an overview of the process for making simple, hand-carved stamps, as well as some tips along the way. I've included some recommendations for supplies like rubber blocks and ink since those are common questions I get via email and Instagram. Some links will take you to Blick Art Materials and Amazon, where some block printing supplies are sold. I participate in their affiliate programs so if you click on those links, I would get a small commission (at no cost to you) if you end up buying something on the sites, but please shop at your favorite store! You can find more details about this here. McClain's Printmaking Supplies is a wonderful, smaller online shop that also sells relief printing materials.
Rubber Stamp Block Printing
Stamp Carving Supplies
The first thing we’re going to talk about is what supplies you need to have on hand - it’s pretty basic.
Rubber carving block - I’ve used many of the most popular brands of rubber blocks and I like Blick E-Z-Cut Printing Blocks, Speedball Speedy-Carve and Speedball Speedy-Cut. If you’re used to carving linoleum or wood, you’ll be amazed (or frustrated) at how soft and easy the rubber block is to carve. If you’re not careful, they can tear and small details can get lost. Consider yourself warned! :)
What’s the difference between Speedball Speedy-Cut and Speedball Speedy-Carve?
Speedy-Cut is considered the more entry-level product of the two. It’s white, less expensive, comes in fewer sizes and you can’t buy it in a really large block. It contains latex and you can’t use oil-based ink with Speedy-Cut.
Speedy-Carve is pink, latex-free, and a little more expensive. It’s thinner and comes in more sizes, including a 11.75” x 11.75” block. You can use oil-based ink with Speedy-Carve.
Blick E-Z-Cut is white and a little thinner than Speedy-Carve. It’s also less expensive than both Speedy-Cut and Speedy-Carve. It doesn’t feel quite as substantial as the Speedball blocks and the big block I bought has strange beveled edges. But, it’s worked fine for simple projects and it’s cheap.
Carving tools - linoleum or woodblock carving tools. (Read my full review of block printing carving tools)
Brayer (or roller) - like the popular, classic Speedball soft rubber brayer
Ink - water-soluble block printing ink like those made by Speedball, Schmincke and Blick. (Read my full review of block printing inks)
Note: If you’re printing on t-shirts or other fabric, you’ll need to print with washable ink. I like Speedball Fabric Block Printing Ink, which is oil-based. You can see my page on block printing t-shirts for more details.
Paper - blank greeting cards, Japanese printmaking paper, card stock, etc.
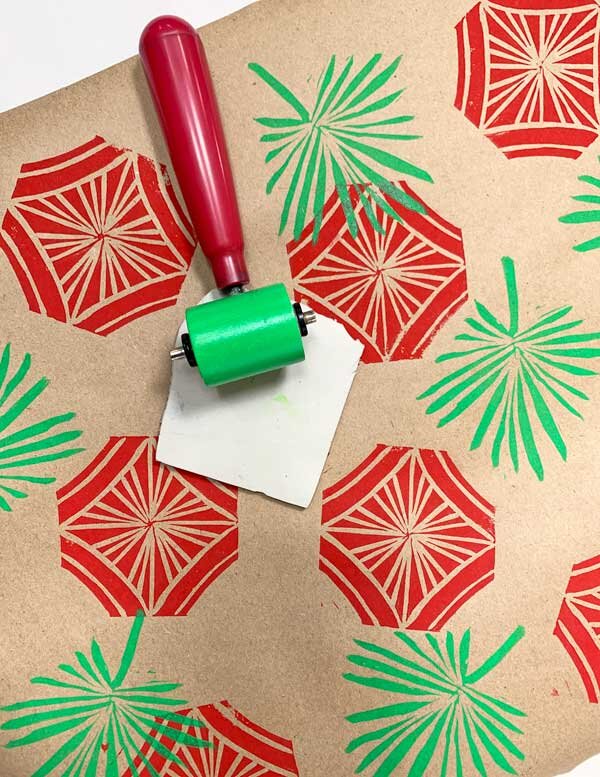
In the tutorial below, I’m going to carve and print a rubber stamp to make wrapping paper. I’m using a Blick E-Z-Cut Printing Block, mostly Power Grip carving tools, Schmincke Aqua Linoprint Ink, a Speedball brayer and a roll of brown packaging paper.
Block Printing Stamp Design
Start by drawing your design directly on the block using pencil. If your block is bigger than you need, cut it down to size with a box cutter knife. These blocks are pretty soft and a sharp pencil can tear the block so be gentle. I try not to use a ball point pen because sometimes the pen ink can show up in your stamped print if you’re using light color printing ink.
Keep your design relatively simple. If you try to carve really fine details, you might get frustrated with these rubber blocks tearing or flaking apart. Also, keep in mind that your carved image will print in reverse so plan your design accordingly - especially when working with letters and numbers. You can use tracing and graphite paper to reverse your image onto your rubber block, if needed.
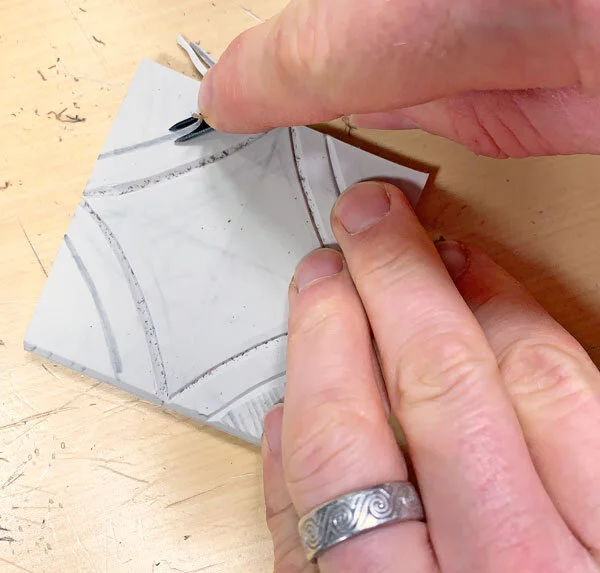
Hand Carving a Rubber Stamp with a V-Gouge Tool
Carving the Rubber Block
Now, grab a V-gouge or U-gouge and start carving your design. Like I mentioned above, these blocks are soft so carve slowly. As a simple reminder, what you’re carving out of the block won’t be printed. I know that might sound obvious, but it can take a while to get used to thinking in those black & white terms. Always carve in a direction away from your other hand for safety's sake.
Inking your Rubber Stamp
Take your tube of block printing ink and put a dab on a sheet of glass, mirror or metal tray. Spread out the ink with a palette knife or piece of cardboard and roll out the ink with your brayer until you get a thin, even layer on it. Then, roll the ink onto your block. Try not to put too much ink on your block so that you don’t fill any small details you might have.
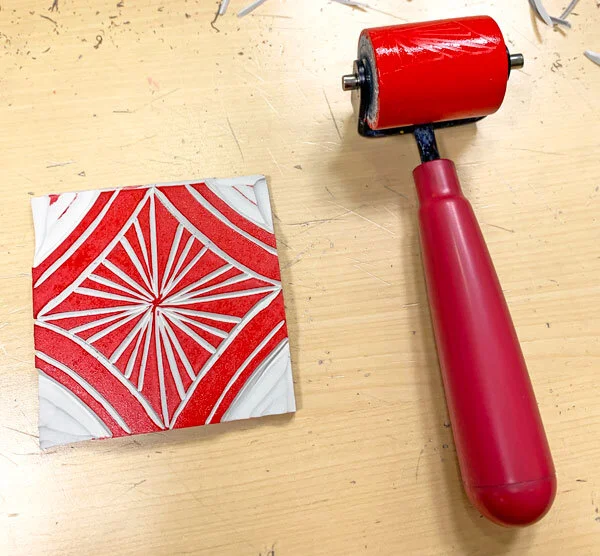
Inked Rubber Stamp and Brayer
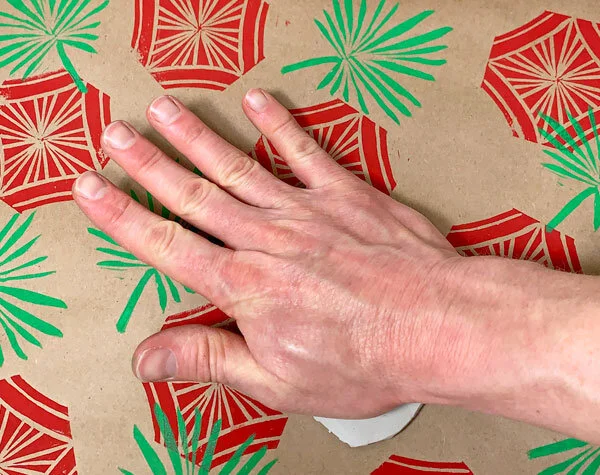
Printing the Block
Now that you’ve inked your rubber block, place it face down on your paper. This is different than how I usually print my linoleum and wood blocks, as those are printed with the block underneath the paper. Once the block is down, don’t move it because your stamped image will get smudged. Press down evenly with your fingers/hand. You need enough pressure to transfer the ink to the paper but too much brut force can distort your image because the rubber blocks are soft. You could even use a baren to push down on the block. Re-ink the block every time you stamp.
It might take some practice to get the right inking and printing technique down but you’ll get it soon enough! You can always contact me if you have any questions.
Printing a Rubber Stamp by Hand
Making a Linoleum Stamp
You can use traditional linoleum to make a stamp but you need to tweak the process a little. First, I find it best to mount the lino on a piece of wood (or buy mounted lino). Secondly, when you hand print it, put a piece of scrap fabric under your paper. This extra cushion will help you get a crisper stamped image.
Last Updated: September 12, 2023