
Continued from The Linocut Process - Part 1
How to Make Multi-Color Lino Prints
Now that we've gone over the basics of making a simple, one-color block print, I'll go over a few techniques for making multi-color linocuts. You can use the reduction method, jigsaw method, or multiple block technique to make prints with more than one color. I sometimes use a couple methods on the same print like on this Lake Tahoe print - A Noble Sheet of Blue Water. However, there's also a relatively easy way artists can add a pop of color to a print using a technique called the rainbow roll, also known as a gradient or blended roll - I'll explain these various options in detail below. I've linked some of my supply and book recommendations below to Amazon and Blick so you can take a closer look and some of them are not available at local stores depending on where you live. Just so you know, if you end up buying something on Amazon or Blick, I'd get a small commission since I'm part of their affiliate program, but feel free to shop elsewhere. You can find more details about this here.
Multi-Color Lino Block Printing Using the Blended Roll Technique
Multi-Block Block Printing Process
As the name of this multi-layer block printing technique implies, each color in the print is made from a different block. So, for example, if you're going to have four colors in your final print, you're going to carve four different blocks. Now there are ways to squeeze more colors into that final image using those four blocks by carefully inking different parts of the block in different colors. Maybe the top half of the block is blue, while the bottom is red. In other words, you might be able to get six colors out of those four blocks.
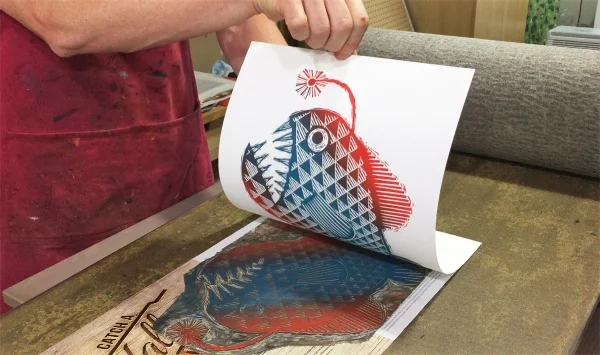
A challenge of this technique is making sure that each of the blocks are registered (i.e. line up) correctly. This will ensure that each printed layer lines up nicely as the multiple layers stack up as you print them one by one. Printmakers have all different ways to ensure good registration. Personally, I like using a homemade, "L"-shaped wooden registration jig (pictured in this blog post), which helps me lay the paper on the block the exact same way every time. Here's a short video of me printing a two-block relief print. A nice thing about using multiple blocks is that you have more control over the final print because you can test and tweak the blocks and colors before printing the final edition.
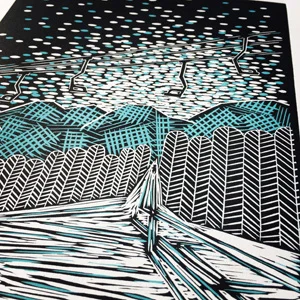
Deconstruction and There Seldom is a Single Wave were made with separate blocks for each color.
Reduction Linocut - "Last Run" Skiing Print
Reduction Linocut Print Technique
One of my favorite lino cut techniques is the reduction print method, when you use the same linoleum block to print multiple colors. It sort of requires a whole different mindset when making a print so I've broken down all the steps of the reduction print process and teach an online class focusing on this technique.
Jigsaw Linoleum Cut Method
I like this technique to print many colors at one time. Basically, you cut your lino block into pieces, and when it comes time to print, you ink them separately, and reassemble the pieces like a jigsaw. I recently did a blog post about making a big jigsaw linocut print and included some tips.
In the aerial lino print below, titled Aloft II, I printed both shades of green, as well as the pink, at the same time using multiple blocks. I posted a quick work in progress pic of that step in this Instagram post.
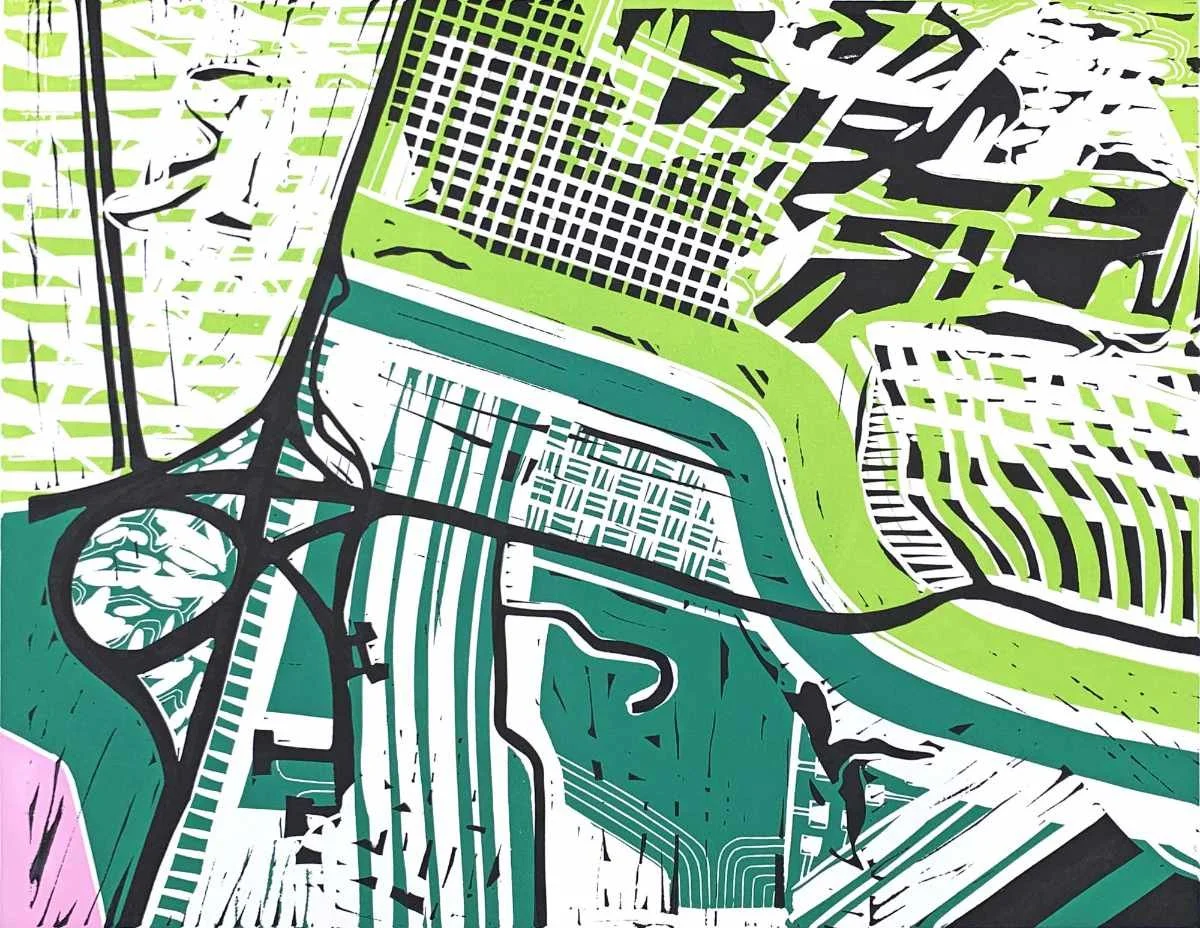
Aerial Linocut Print - Aloft II
Rainbow Roll Technique
A rainbow roll is also known as a blended or gradient roll. The premise is that you load your brayer (I usually use a 6-inch Speedball brayer) with two or more colors and then roll that onto your carved linoleum block. The simplest version would be a two-color blended roll. You put two dabs of different color inks on your rolling out surface (probably glass). Separate those dabs of ink by a couple inches depending on your width of your brayer. Spread the ink up and down with palette knives and then roll out the ink with your brayer slowly. The ink with spread out on your brayer and will eventually meet in the middle creating a color gradient. I think this quick video I posted showing me inking up a linoleum block with a blended (e.g. rainbow, gradient) roll will help you visualize the process.
Printmaking Books
I think these are very good general printmaking books. The more contemporary book, The Printmaking Bible, has a much longer linocut section.
The Printmaking Bible by Ann d'Arcy Hughes and Hebe Vernon-Morris
The Complete Printmaker by John Ross, Clare Romano and Tim Ross
These are some recommended books highlighting the work of master relief printmakers:
Art for All. The Colour Woodcut in Vienna around 1900 by Natter, Hollein and Schroder. This is a really gorgeous TASCHEN art book I recently bought. It’s huge but do know that the book is multilingual and the text is repeated in three languages.
Gustave Baumann: Nearer to Art by Krause, Yurtseven and Acton
The High Sierra of California by Snyder and Killion
Artists like Claude Flight, Sybil Andrews and Lill Tschudi had a big impact on the history of linocut. Though this book isn’t exclusively about lino printing, it does cover a lot of this influential period. You might see if you can pick up a used copy of this book like I did.
Rhythms of Modern Life: British Prints, 1914-1939 edited by Clifford Ackley
This book is about the related art of Japanese woodblock printing (Mokuhanga). It's illustrated with a wonderful collection of modern woodblock prints.
Japanese Woodblock Print Workshop by April Vollmer
Printmaking Resources
McClain's Printmaking Supplies is an excellent online source for supplies like ink, paper, blocks and tools. They're my goto source for high-end Japanese carving tools and woodblocks.
Blick Art Materials is a large and dependable retailer of art supplies, including printmaking supplies. I get most of my ink, paper and linoleum blocks here, as well as my etching presses.
Linocut Friends is a large and active Facebook group for linocut artists.
Hida Tool & Hardware sells carving tools and sharpening supplies from its Berkeley, California store.
Linoleum Block Printing Tips and Techniques
Over the years, I've written about techniques and tricks for linoleum block printing. Here are a few posts:
How to make an inexpensive baren.
Linocut design ideas for simple black and white patterns.
A review of Blick etching presses and tips on printing on them.
Basic lino printing registration using Con-Tact paper
I’ve written about the history of linocut.
Background on what linoleum is actually made of.
Designing a print drying rack that hangs from the ceiling.
Transferring your key block design for carving another block (Instagram video).
Dealing with ink in the negative space, or background, of a linocut design.
Using a box cutter and coping saw, you can make a narrow brayer for inking small areas of the block.
Example of linocut printed t-shirts.
Fixing linocut mistakes.
Last Updated: March 9, 2023