
Reduction Linocut Prints
Reduction prints use the same linoleum block to print all of the colors in an image. I'll talk briefly about the history of the process and then I'll lay out the process for making multi-color prints using one of my favorite methods. You'll find some links that will take you to Blick Art Materials and Amazon, where some relief printing supplies can be purchased. Though I would get a small commission if you end up buying something there since I participate in their affiliate programs, the opinions and recommendations are all my own. And, if you have a great store near you, shop there! You can read about my participation in these programs here.
First, a little history…
When people talk about reduction prints, it's sometimes noted that that Picasso invented this technique in the 1950's (see Karshan's book, Picasso Linocuts 1958-1963), but this myth has been debunked. Check out Alisa Bunbury's conference paper, "Not Picasso's invention - a foray into the history of reductive linoprinting" for the fascinating history of the process. I also wrote a blog post that includes a video of Picasso's reduction linocut method.
Two-Color Reduction Linocut
The Process in Summary
The process starts with carving a design into a new lino block and printing the first color on each sheet of paper in the edition. Then the printmaker carves more of the same block away and proceeds to print the second color. The process of carving and printing continues for each additional color until the final layer is printed. After completion of the print, another edition can never be made because the block has been carved away during the creation process.
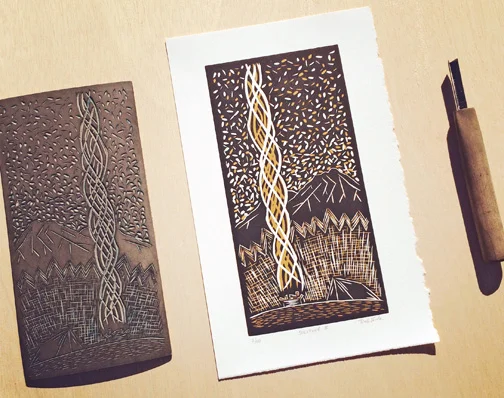
In the camping print pictured above, I printed the amber color first, followed by the black layer. Typically, one prints from lightest to darkest color like in this example.
Reduction Linocut Example
Take this car linocut as another reduction print example. This is a two-color car print that I made quite a while ago. The red layer was printed first, then I carved more of the same linoleum block away and printed the black, second layer on top.
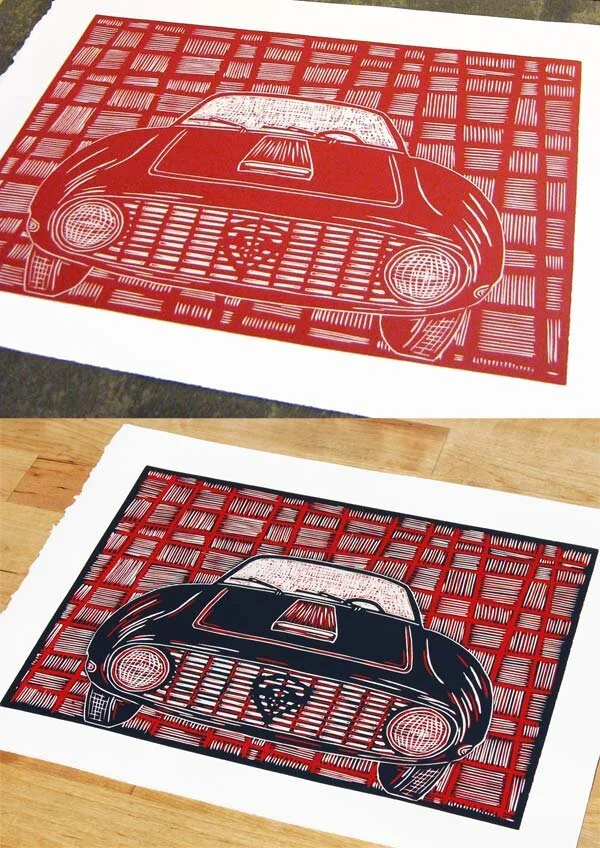
Reduction Linocut Example
Online Class
Linocut Fundamentals and Reduction Printing
Online Linoleum Block Printing Course
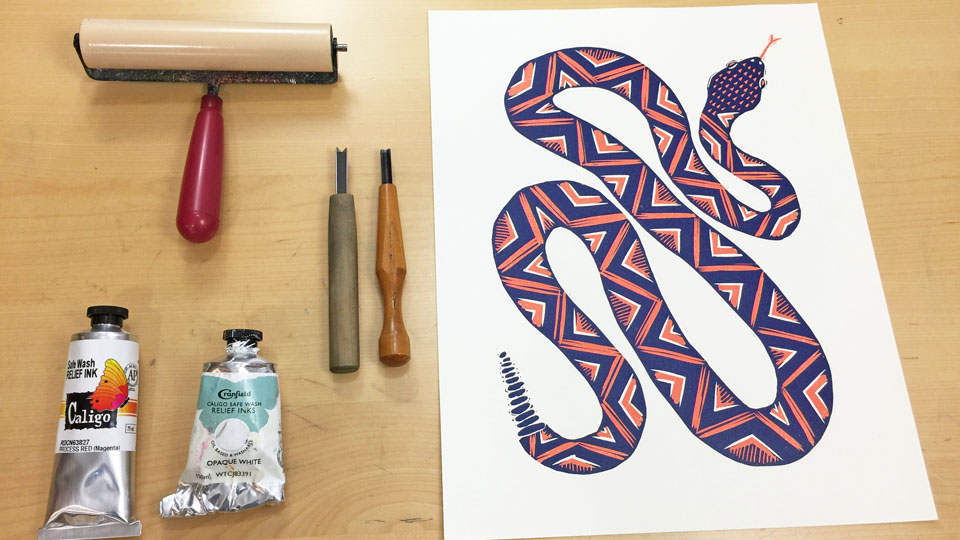
10-Step Reduction Printing Process
Start on my process of making a linocut page if you want the basics of making lino prints and recommendations on supplies.
Lay out the design, backwards.
Carve the linoleum (or wood) block. A Speedball Linoleum Cutter is a simple, affordable tool and I use battleship gray linoleum.
Decide on your edition size. Make enough because you can’t make more later.
Print it with ink.
Carve more of the same block away.
No turning back now.
Print another color, usually darker.
Continue the process for each layer of color.
If you make a mistake, think of a workaround or start over.
Looking good? All done? Awesome. You now have your final, and only, edition.
Of course, this tutorial lays out a straightforward one-block reduction print. It's also possible to reduce two blocks for one print or combine this technique with others to produce a wide range of work.
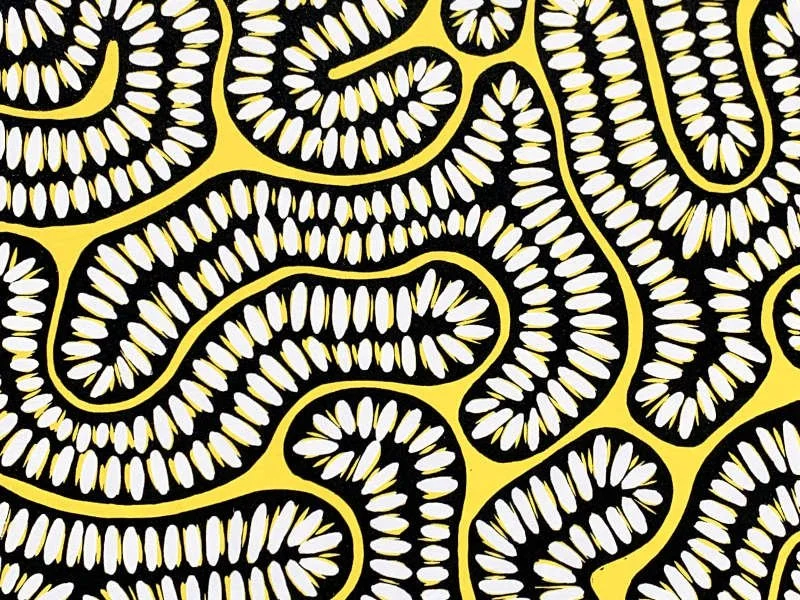
Reduction print pattern
The pattern above was created using the reduction technique with the yellow printed first, followed by the black.
How to Fix Linocut Mistakes
Since you're using the same linoleum block for all the layers in the print when using the reduction method, dealing with mistakes is just something you have to face. Maybe you can tweak the image and work around the mistake. Or, in the worst case, you might have to call it quits and start over - it happens sometimes. But, before you toss that block across the room, here my two preferred ways of dealing with mistakes.
1. Glue a piece of lino into the area you accidentally carved
Let's face it, it's not uncommon for your hand to slip and accidentally carve an area you hadn't intended. Ideally, you will find the exact piece that you carved out and can glue it back into place. In lieu of that, though, you can get a scrap linoleum block and carve out a similarly shaped piece and glue it in.
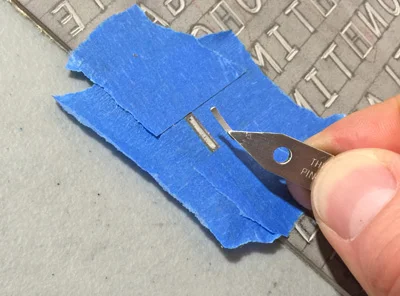
Sizing up the new piece of linoleum to glue into place.
I've had the best luck with clear super glue. Surround the area around the repair with blue painters tape to protect it from any glue that might accidentally get on it. Put a drop or two of glue on a piece of a paper and dab a toothpick in it. Put a little glue on the block where you're making the repair and then some on the scrap you're putting into the hole. Then press the piece firmly in (l like handling tiny lino pieces with small tweezers), wipe away any excess glue, cover it with a small piece of wax paper (to prevent anything else from sticking to the repair) and weigh it down with some heavy books.
Let it sit until it's dry and then sand the repaired area with fine sandpaper. Leave the tape on while you're sanding to protect the surrounding areas of the block.
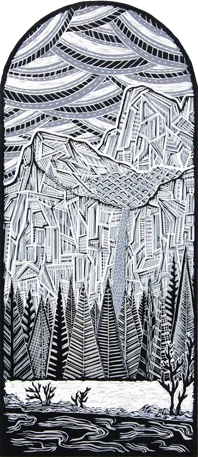
Yosemite Linoleum Block Print
2. Carve a second linoleum block to print over a mistake or fix a compositional issue
Every once in a while, particularly as your layers in a reduction print start to add up, you wish you hadn't carved out a particular area so soon. Just because a print started off as a reduction, doesn't mean you can't get a second block and throw that into the mix.
This happened to me on print I did of a waterfall in Yosemite National Park. Take a look at the trees and water towards the bottom. When I started on the third layer I realized I wanted to add some depth to the image so I got a second block and overprinted the trees and water with a light gray layer. Then I continued with my original block, carved its third layer, and finished the print.
Last Updated: February 8, 2024